

Geometry is a part of math that studies the shapes and sizes of figures on flat surfaces and in space. A key tool used in geometry is a protractor.
This post explains what a protractor is, how to use it, and why it is important for learning and doing math.
Index
What is a Protractor?
- Draw geometric shapes like triangles, squares, and regular polygons, and learn how their interior and exterior angles relate to each other.
- Solve geometry problems by measuring and calculating angles, for example, figuring out the slope of a ramp.
- Real-life usages: Apply geometry in real life by measuring angles in places like buildings and parks, and by aligning objects.
- Create art by using a protractor to design mandalas or other geometric patterns.
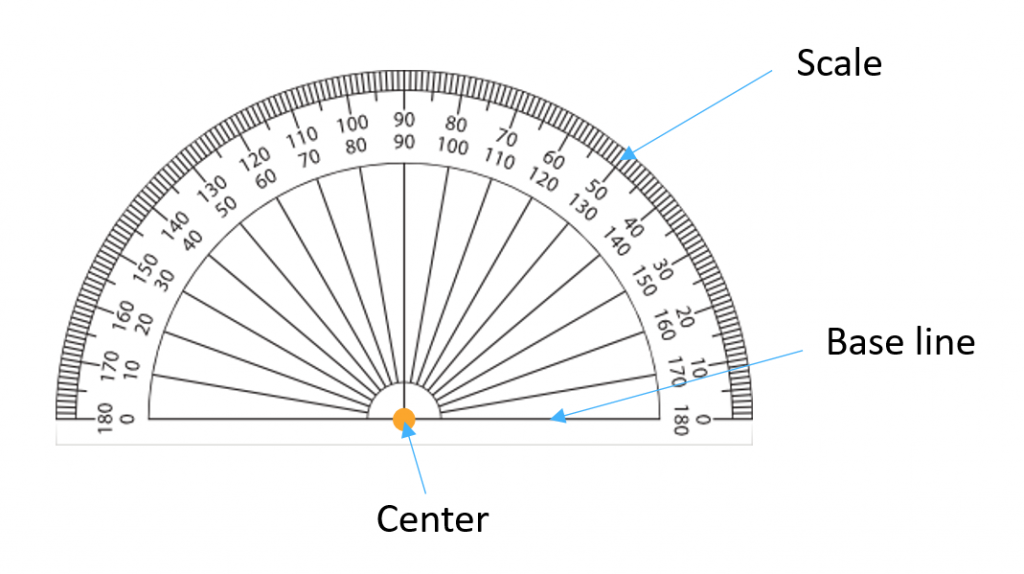
Parts of a Protractor
- Base: The straight edge of a protractor. You line it up with one side of the angle you want to measure.
- Center: The point in the middle of the base where you start measuring degrees.
- Scale: The marks on a protractor that indicate degrees. Each mark stands for one degree.
How to Use a Protractor
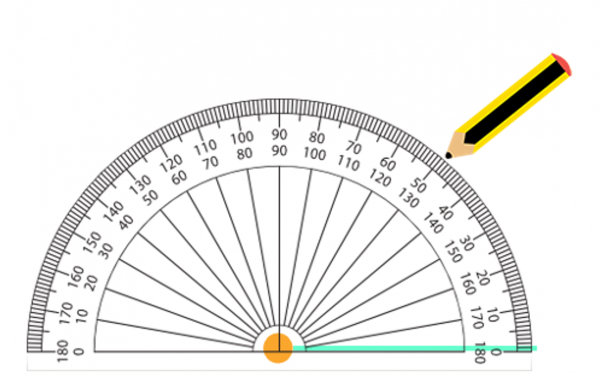
Measure an Angle
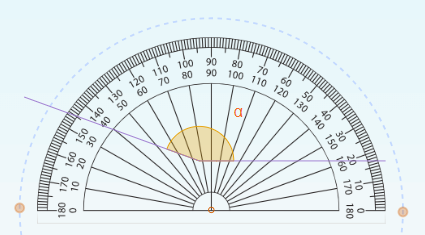
1. Place the base of the protractor along one side of the angle and align the center point with the angle’s vertex.
2. Read the value on the scale where the other side of the angle intersects the protractor scale. The angle in the example measures 160 degrees.
Draw an Angle
Follow these steps to construct an angle with a protractor.
1. Mark a point that will be the vertex of the angle and draw a straight line from the vertex, which will be one of the sides of the angle.
2. Place the center point of the protractor on the vertex and the base along the drawn line.

3 . Make a mark on the paper at the desired angle on the scale. In the example, we will mark 50 to draw a 50-degree angle.
4. Connect the vertex with the mark to form the angle.
Smartick Protractor Exercises
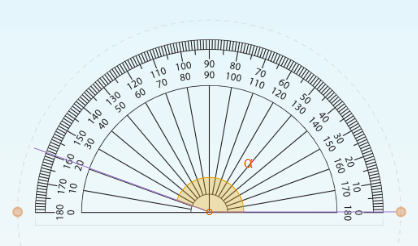
- Exercise 1. Practice measuring angles using a protractor. In this exercise, you need to identify the angle shown on the screen by carefully placing the protractor according to the measurement steps: align the base with one side of the angle, center the vertex, and then read the degree on the scale where the other side intersects. For this example, angle α measures 150 degrees.
- Exercise 2. Practice constructing angles using a protractor. In this activity, your task is to create a 45-degree angle. Begin by marking the vertex, drawing a baseline, and then using the protractor to locate the 45-degree mark on the scale. Finally, connect the vertex to the mark. Digitally, move the interactive orange dot to adjust the angle to the correct measurement.
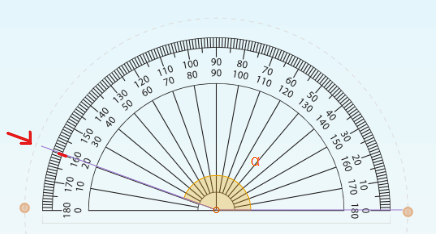
- Exercise 3. Examine the relationship between two angles using a protractor. In this exercise, your goal is to determine whether two given angles add up to 90 degrees. Measure each angle using the protractor as described earlier—align the base with one side, center the vertex, and read the scale. Then, add their measurements to check if the sum equals 90 degrees.
Learn More:
- Learn about Angles: Obtuse, Straight, Right and Acute Angle
- What is an Obtuse Angle?
- What is a Straight Angle and Examples
- Consecutive Interior Angles: What They Are and How to Find Them With Examples
- What Is an Angle? How Is It Made?


A multidisciplinary and multicultural team made up of mathematicians, teachers, professors and other education professionals!
They strive to create the best math content possible.